Thank you to all the fans and garden lovers who came out to our first Fall GardenPalooza event at Fir Point Farms. It was a great day and we saw thousands of people come out and get their fill of garden plants, décor items and even some farm fresh treats, and that doesn’t even count the wine and beer tasting.
Also, congratulations to Marcia and Marvin who were winners of our Al’s Garden Center gift cards.
We now get to settle into the fall festival season. We know that there are tons of local farms that are welcoming people throughout the month. This week we visit with Brian at Bauman Farms to see what they have planned. It should be a great fall if this week’s weather is any indication!
Enjoy your fall!
This week we featured...
ChowSwap
This time of year the garden is in full production. We are loaded with tons of produce, maybe a little too much. There is one way to take care of all this bounty without letting it go to waste. We recently found out about the website, ChowSwap.org. This site is a clearing house of local people who are looking to trade or swap what they have for a little bit of what you have. Jeff Ong started it when his girlfriend had too many eggs form her chickens. He decided to set up the website and offered to swap her eggs for whatever he could find. Now there are over 250 users and they are swapping everything from beef to vegetables and even homemade beer. And it is growing; there are now people that are using the site in Salem and Eugene. If you have a little too much of something in your garden and you are looking to share with someone else check out www.ChowSwap.org.
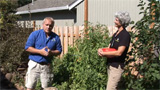
Bauman Fall Festival
The fall is here and that means it is time for Bauman’s Fall Festival. This year the people at Bauman’s Farm and Garden (503-792-3524) are celebrating another year of fall fun and they have something planned for each weekend. This weekend they are kicking off the fall by offering a special discount for their Rewards Club members. Every member will receive $5 off the cost of an activity band. If you don’t have a Member Rewards card they will sign you up at the gate and you can still get the discount! The activities band will let you enjoy over 20 different activities on the farm, including the new Pumpkin Hill and Realm of Darkness! They are also introducing the Gem Mining sluice, where you can mine for gems, shark teeth and even fossils.
The following weekend there are tons of events centered around the Bauman’s Giant Pumpkin Weigh-off. Last year the weigh off at Bauman’s included a new Oregon record! The weigh-off weekend includes the inclusion of other ‘giant’ vegetables like tomatoes, watermelons and sunflowers. The big event is the giant pumpkin drop at 1pm on Saturday. After the big drop you can enjoy all of the outstanding harvest activities that Bauman’s has become famous for. There are hay mazes, zip lines, petal carts, slides, a bunch of bounce houses, the jumping pillow and so much more! You can also enjoy some of their great baked goods, wonderful plants and all kinds of fresh garden produce.
Of course the stars of the show will be the giant pumpkins. These giants can get as big as 1,500 pounds and larger! The winning pumpkin will walk away with a nice prize check and that is sure to guarantee a ton (sorry for the pun) of pumpkins will be entered. Even though the weigh-off is over on Saturday the 6th, the pumpkins will be on display for the whole weekend and the winners will stay for the whole month. Come and walk among the giants!
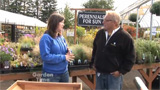
Adaptive Gardening
Getting around in the garden shouldn’t be a chore. Gardening can relieve your emotional stress and using the right tools can relieve your physical stress as well. We stopped by Portland Nursery on Division (503-788-9000) to see a couple of way for people to stay active in the garden even with limitation. The first thing we saw was a raised bed that can be used by someone in a wheelchair. This one was specially built, but you can build your own with a little imagination and some simple materials. We saw a wrought iron table that had a mesh top to it. This can be converted into a raised bed by just covering it with a garden fabric or weed barrier. Then you can create sides with some 2x4s and then filling it with soil. Also, look at hand tools that are comfortable to hold, not just what is on-sale at the discount store. We saw a trowel that was designed to take the stress off you hand. You can also extend your enjoyment in the garden by using the correct posture and limiting the time you spend doing a single chore. If you take a break every 20 minutes or so, you will find the ‘work’ of gardening to be less taxing. Container gardening is also a way to take some of the work out of gardening. With containers you can garden from a chair or bench and it also makes harvesting easier as well! We saw a nice little padded kneeler that could be turned over to become a chair so you could take a break if you needed one. For more information on finding the right tool, check at the help desk of either Portland Nursery location or your local independent garden center.
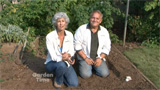
Planting Onions and Garlic
A few minutes now will lead to a flavorful future. Judy and William gave us tips for planting onions and garlic for the fall. Planting now will allow the onions and garlic bulbs to create the roots that will make for a bountiful harvest next summer and fall. To plant the onions, we found some seed. It can either be found at your local garden center or through an on-line seed company. Onion seed is very small so you so will actually apply too much seed when you start planting. After it starts to grow you can go in and thin the seed to create room for the onion bulbs to grow. Prepare the soil with a raised row of soil. We amended the soil with Black Gold Natural and Organic potting soil. This will give it a nice start. Spread the seed along the row and lightly cover it with soil. You may also find onion starts (also called sets) at your local garden center. These ‘sets’ can be pulled apart and planted individually about 3-4 inches apart. For the garlic, first dig a trench about 4 inches deep. Get some garlic from your local garden store. Don’t use the garlic from your local grocery store; it is treated to keep from sprouting. Break apart the cloves and plant the individual parts about 3-4 inches apart. Top dress with a bulb food or the Black Gold potting soil and water well. Garlic is one of the easiest bulbs to grow, so this could be the start of a successful garden for next year.
Canning Tomatoes
This year has been a record year for tomatoes. If you are having a record year for tomatoes, you might be thinking about preserving some for the year ahead. One way of doing that is to can them. We found some great canning instructions at the OSU Extension website. Let’s walk you through the steps, briefly, on how to can, though you can find the complete instructions at the website.
To start we picked tomatoes that were ripe or just getting ripe. You do not want to can over ripe fruit. If it has started to spoil it could taint the rest of the jar. We also picked a lot of different varieties for our canning. This will add different flavors and textures to our soups, salsas and stews. If you are making a sauce or ketchup you may want to stick with one variety.
There are 2 methods for canning a ‘hot pack’ method and a ‘raw’ or ‘cold pack’ method. We are doing the raw/cold pack method. Start by washing and sterilizing the jars, rims and lids. Boiling water is the best way of doing this. Make sure you check the jars for chips (don’t use those) and the rims for rust (don’t use those either). Next, fill your canner with water and start heating it to a boil. Fill another pot with boiling water for blanching your raw fruit. You will also need an ice bath for the fruit after it is blanched.
Now place the tomatoes in the hot blanching water for about a minute until the skins start to crack. Then remove them and place them in the ice bath. You can now remove the skins and cut out the stem cores. Take your sanitized jars and stuff the blanched, skin-less tomatoes in until it is filled to the neck of the jar. Add 2 tablespoons of lemon juice to the jar (to help preserve the fruit) and ¼ teaspoon of salt (this is for flavor). Then fill the rest of the jar with some of the blanch water to fill the jar to about ½ inch from the top of the jar. Run a butter knife or spatula around the inside of the jar to remove any air bubbles. Put the sanitized lids on the top of the jar and secure with the rims/rings till they are hand tightened.
Then you will place them in the canner full of water. Once they are lowered into the canning bath they should have about an inch of water covering the tops. Let them boil in the bath for 45 minutes. Once out of the bath, let them cool. You will hear the lids popping. This is a sign that they are sealing.
Once cool, mark the lid with the date and store in a cool dry place out of direct sunlight. Now you can go to your pantry when you are working on your favorite recipe and enjoy the taste of summer long after the sunny days are gone!
If you have any questions about food preservation you can check out the OSU Extension website at http://extension.oregonstate.edu or you can call the Food Safety and Preservation Hotline at 1-800-354-7319.